The Story Behind This Recipe
I’ll be straight with you — when I first heard the name “boy kibble” floating around the internet, I thought it was a joke. Ground beef and rice? That’s not a trend, that’s Tuesday night at my grandfather’s house in Memphis. We called it “muscle food” long before TikTok existed, and every man I grew up around had his own version in a Tupperware container ready to grab before heading to the job site or the gym.
But here’s the thing — there’s a reason this simple combination has gone viral in 2026. It works. It’s affordable, it’s packed with protein, and when you season it right — and I mean really right, not just salt and pepper — it becomes something you genuinely crave. The problem with most versions I see online is they’re bland. They treat the beef like an afterthought. That’s where my version comes in.
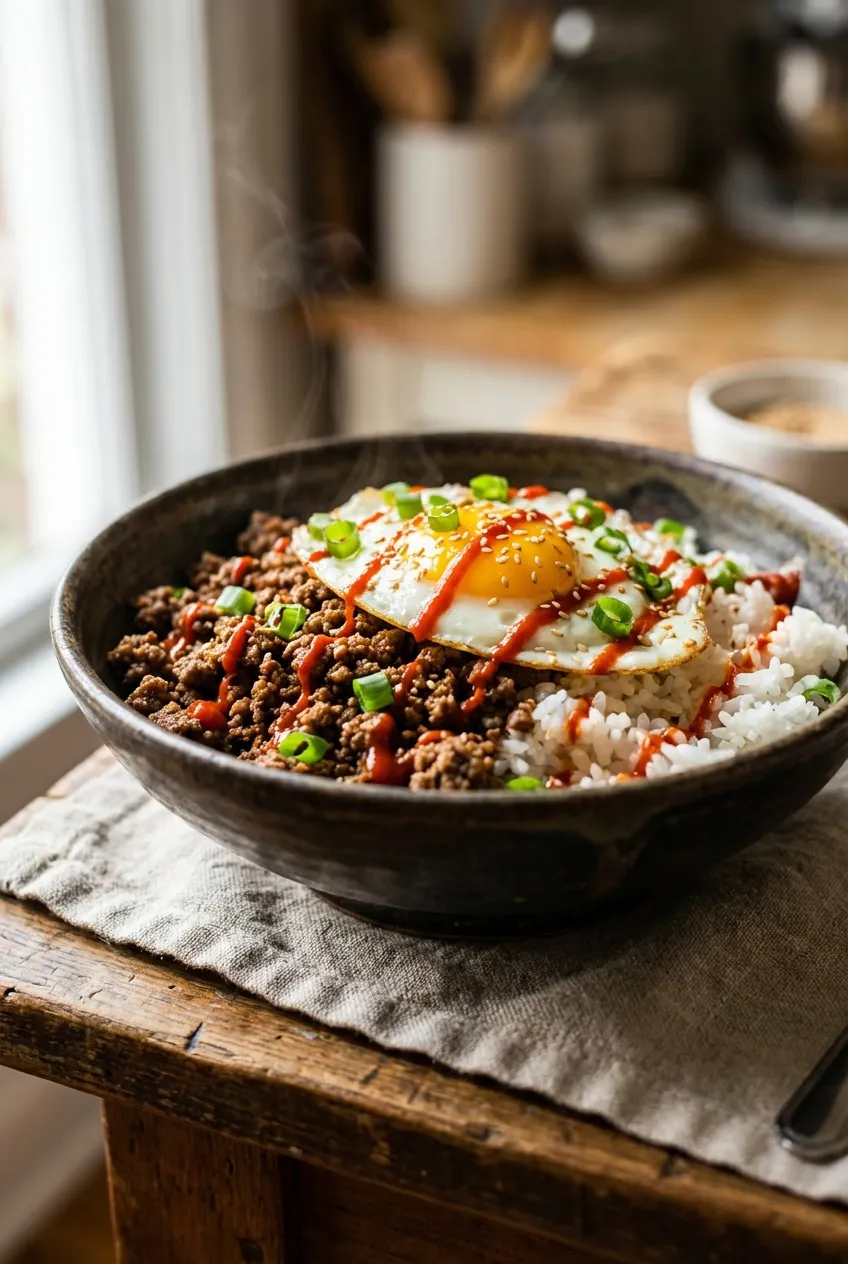
I’ve taken the bones of this viral trend and turned it into something worthy of a proper dinner table. We’re layering aromatics, building depth with smoked paprika and cumin, finishing with sesame oil for that nutty richness, and crowning each bowl with a fried egg that breaks into a golden sauce over everything. This isn’t just fuel — it’s comfort food that happens to pack 42 grams of protein per bowl. My grandfather would’ve approved.
Before You Start
- Cook your rice ahead of time. Day-old rice from the fridge actually works best here — it’s drier and won’t get mushy when you plate it under the hot beef. If cooking fresh, spread it on a sheet pan for 10 minutes to steam off excess moisture.
- Use 80/20 ground beef. Leaner beef dries out and crumbles into sad, grainy bits. You need that fat for flavor and moisture. If you go leaner, add an extra tablespoon of oil.
- Have everything prepped before you start cooking. This recipe moves fast — garlic minced, spices measured, green onions sliced. Once the beef hits the pan, you won’t have time to fumble around.
- A well-seasoned cast iron skillet works best for both the beef and the fried eggs. The heat retention gives you a better sear on the meat and crispier egg edges.
Instructions
Step 1: Season and Brown the Beef
Heat neutral oil in a large skillet or cast iron pan over medium-high heat until it shimmers, about 2 minutes. Add the ground beef, breaking it into large chunks — resist the urge to crumble it too finely. You want some pieces to develop a proper crust. Let it cook undisturbed for 3-4 minutes until the bottom develops a deep brown sear.
Break the beef into smaller pieces and continue cooking for another 4-5 minutes, stirring occasionally, until well-browned throughout. You should hear a steady sizzle, not a wet bubbling sound — if you hear bubbling, your pan isn’t hot enough. Drain off about half the rendered fat, leaving enough to coat the pan.
Step 2: Build the Flavor Base
Reduce heat to medium. Add minced garlic and stir constantly for 30 seconds until fragrant — you’ll know it’s ready when the raw garlic smell transforms into something sweet and nutty. Don’t let it burn.
Add garlic powder, onion powder, smoked paprika, cumin, and cayenne pepper (if using). Stir the spices into the beef for 1 minute, letting them bloom in the fat. This step is what separates a great bowl from a mediocre one — dry spices need heat and fat to unlock their full flavor potential.
Step 3: Add the Sauce
Pour soy sauce and sesame oil over the seasoned beef and toss everything together for 1-2 minutes. The soy sauce will hit the hot pan and sizzle aggressively, creating a light glaze on the meat. Taste and adjust seasoning with salt and pepper — remember, the soy sauce is already salty, so go easy. Remove from heat and cover to keep warm.
Step 4: Fry the Eggs
In a separate non-stick or well-seasoned pan, heat a thin film of neutral oil over medium heat. Crack eggs one at a time into the pan, leaving space between them. Season with a pinch of salt and pepper. Cook for 3-4 minutes until the whites are fully set but the yolk is still runny and jiggly when you gently shake the pan. For crispy-edged eggs, increase heat to medium-high for the last 30 seconds.
Step 5: Assemble the Bowls
Divide warm rice among four bowls. Spoon the seasoned beef generously over the rice. Place a fried egg on top of each bowl. Garnish with sliced green onions, sesame seeds, and a generous drizzle of sriracha or gochujang sauce. Add sliced avocado and steamed broccoli if using.
Step 6: Break and Devour
Pierce the egg yolk and let it cascade over the beef and rice — this is the moment that makes the whole bowl come alive. The runny yolk acts as a rich, velvety sauce that ties everything together. Mix it all up or eat it in layers — there’s no wrong way.
Ingredient Substitutions
| Ingredient | Substitute | Notes |
|---|---|---|
| Ground beef | Ground turkey, ground chicken, or ground bison | Turkey is leaner — add an extra tablespoon of oil. Bison is a premium swap with similar richness. |
| Jasmine rice | Brown rice, cauliflower rice, or quinoa | Brown rice adds fiber; cauliflower rice cuts carbs significantly. Quinoa adds more protein. |
| Soy sauce | Coconut aminos or tamari | Coconut aminos are sweeter and lower sodium. Tamari is the gluten-free option. |
| Sesame oil | Toasted walnut oil or extra-virgin olive oil | You’ll lose the nutty depth, but the dish still works. |
| Eggs | No direct substitute | The fried egg is essential to this dish. If avoiding eggs, top with a tahini drizzle instead. |
| Sriracha | Gochujang, sambal oelek, or hot honey | Each brings a different heat profile — gochujang adds fermented depth, hot honey adds sweetness. |
| Green onions | Chives or thinly sliced shallots | Similar aromatic brightness. |
| Avocado | Pickled cucumbers or kimchi | Both add a welcome acidic contrast to the rich beef. |
Chef’s Tips
- Don’t over-stir the beef. The biggest mistake people make is constantly breaking and stirring the ground beef. Let it sit and develop a crust — those browned bits are where all the deep, savory flavor lives. Think of it like searing a steak, just in smaller pieces.
- Day-old rice is the secret weapon. Freshly cooked rice is too moist and will make the bowl soggy. Cook rice ahead and refrigerate it uncovered — the drier texture absorbs the beef juices and soy sauce perfectly.
- Bloom your spices in fat. Adding dry spices directly to the meat and fat (instead of sprinkling them on at the end) unlocks significantly more flavor. The fat-soluble compounds in spices need heat and oil to fully activate.
- Make it a Sunday prep ritual. Cook a big batch of seasoned beef and rice on Sunday, portion into containers, and you’ve got high-protein lunches for 4-5 days. Fry the egg fresh each day for the best texture.
- Elevate with toppings. This bowl is a canvas. Try kimchi, pickled jalapeños, furikake, a squeeze of lime, or a spoonful of crispy chili oil. Each topping creates a completely different experience.
Meal Prep & Storage
- Refrigerator: Store the seasoned beef and rice separately in airtight containers for up to 5 days. The beef actually develops deeper flavor after a day in the fridge as the spices meld.
- Reheating: Microwave individual portions for 2-3 minutes, stirring halfway. For better texture, reheat the beef in a skillet over medium heat for 3-4 minutes to re-crisp the edges.
- Freezing: The seasoned beef freezes beautifully for up to 3 months. Freeze in individual portions for easy grab-and-go meals. Rice can be frozen separately in zip-top bags.
- Batch scaling: This recipe doubles or triples effortlessly. Use a large Dutch oven for bigger batches to maintain good browning.
Pairing Suggestions
- Drink: An ice-cold light lager or Japanese beer like Sapporo complements the savory, umami-rich bowl perfectly. For non-alcoholic, try an iced barley tea.
- Side: Quick-pickled cucumbers with rice vinegar and sesame seeds add a refreshing crunch that cuts through the richness.
- Vegetable: Steamed or roasted broccoli tossed with a splash of soy sauce and garlic — simple and nutritious.
- Wildcard: A small bowl of miso soup alongside turns this into a complete, restaurant-quality meal in under 30 minutes.
Frequently Asked Questions
Why is this called “boy kibble”? The name started as a playful internet joke comparing simple, repetitive high-protein meal prep to pet food. It went viral on TikTok in early 2026 when fitness creators started sharing their ground beef and rice bowls. Despite the silly name, the concept is sound — it’s an affordable, high-protein meal that’s easy to batch cook and tastes great reheated.
How much protein is in each serving? Each bowl packs approximately 38-42 grams of protein, depending on your beef-to-rice ratio and whether you include the egg. That’s roughly the same as a large chicken breast, but significantly more satisfying and flavorful.
Can I make this in advance for the whole week? Absolutely — that’s the whole point. Cook the beef and rice on Sunday, portion into 4-5 containers, and refrigerate. Fry a fresh egg when you’re ready to eat. The beef actually tastes better after a day as the spices develop. Just store beef and rice in separate containers to prevent sogginess.
What’s the best rice-to-beef ratio? I recommend about 3/4 cup cooked rice to a generous scoop of beef per bowl. But honestly, adjust to your macros and appetite — more rice for extra carbs and energy, more beef for higher protein. That’s the beauty of a bowl like this.
Is this actually healthy? It’s a solid, balanced macro meal — high in protein, moderate in carbs and fats. It’s not a salad, but it’s not junk food either. You’re getting complete protein from the beef and egg, complex carbs from the rice, and you can add as many vegetables as you want. For a leaner version, use 90/10 beef and swap to brown rice or cauliflower rice.
Can I make a vegetarian version? Swap the ground beef for crumbled extra-firm tofu or seasoned tempeh. Brown the tofu in the same spice blend and add an extra tablespoon of soy sauce. It won’t be identical, but it’s delicious in its own right.