The Story Behind This Recipe
My grandfather, James Earl Williams, ran a backyard pit in South Memphis for thirty-seven years. No restaurant, no sign on the street — just a cinder block pit he built himself in 1958, a stack of hickory logs from a buddy’s farm in Fayette County, and a reputation that spread by word of mouth across every church, barbershop, and corner store in the neighborhood. People would drive across town on a Saturday just to buy a shoulder out of his backyard. He never wrote a recipe down. He didn’t need to. He knew by the color of the smoke, the feel of the bark, and the way the bone shifted when he grabbed it whether that pork was ready. I spent every summer from age seven watching him work that pit, and by the time I was twelve, he let me tend the fire through the night.
That’s where everything started for me. The competitive circuit, the smokehouse, the three grand championships at Memphis in May — all of it goes back to those summers on Grandpa James’s patio, breathing hickory smoke and learning that great barbecue isn’t about shortcuts or tricks. It’s about patience. It’s about trusting the process. A pork shoulder is a tough, stubborn piece of meat full of collagen and connective tissue, and the only way to turn it into something transcendent is time and low heat. There’s no hack. There’s no cheat code. You give it twelve hours at 225 degrees and you earn every strand of that tender, smoky, melt-in-your-mouth pulled pork.
This recipe is as close as I can get to Grandpa James’s backyard pork on paper. The rub is my competition blend — a little more cumin and cayenne than the traditional Memphis profile, because I like that warmth building underneath the sweetness. The sauce is optional, honestly. Real Memphis pulled pork doesn’t need it. But I include my version because sometimes you want that tangy, sticky glaze on a bun with coleslaw, and this sauce was good enough to win me my first Grand Championship trophy in 2014. Make it your own. Adjust the heat, the sweetness, the smoke. But whatever you do — don’t rush it.
Before You Start
- Choose the right cut. You want a bone-in pork shoulder (Boston butt), ideally 8–9 pounds. The bone adds flavor and acts as a built-in thermometer — when it wiggles freely, the pork is done. Avoid boneless; it dries out faster and doesn’t shred as well.
- Give the rub time to work. Apply the dry rub at least 12 hours before you smoke, ideally the night before. This gives the salt time to penetrate deep into the meat through dry brining, and the spices will bloom on the surface.
- Manage your fuel. Whether you’re using an offset smoker, a kettle grill, or a pellet smoker, the key is maintaining a steady temperature. Hickory is the traditional Memphis wood. Have more fuel on hand than you think you’ll need — running out mid-cook is a disaster.
- Get a good thermometer. An instant-read probe thermometer is essential. You’re targeting an internal temperature of 195–205°F (90–96°C). Don’t guess. The difference between 190°F and 200°F is the difference between pork that slices and pork that pulls apart like cotton.
- Plan your day. A full pork shoulder takes 10–14 hours depending on size, plus resting time. Start early — I typically put the shoulder on at 6 AM for a 7 PM dinner.
Instructions
Step 1: Build the Dry Rub
In a medium bowl, combine 3 tablespoons smoked paprika, 2 tablespoons dark brown sugar, 1 tablespoon black pepper, 1 tablespoon garlic powder, 1 tablespoon onion powder, 2 teaspoons kosher salt, 2 teaspoons ground cumin, 1 teaspoon cayenne pepper, 1 teaspoon dried oregano, and 1 teaspoon mustard powder. Whisk until evenly blended with no clumps of brown sugar remaining. This makes about ¾ cup of rub — more than enough for one shoulder with some left over. Store extra rub in an airtight jar for up to 3 months.
Step 2: Prep and Season the Pork (Night Before)
Pat the pork shoulder thoroughly dry with paper towels — moisture on the surface prevents the rub from adhering and inhibits bark formation. Trim any thick, hard fat cap down to about ¼ inch — you want some fat for basting but not so much that the rub can’t reach the meat.
Coat the entire shoulder with a thin layer of yellow mustard — about 2 tablespoons. This acts as a binder for the rub and the mustard flavor cooks off completely; you won’t taste it in the final product. Apply the dry rub generously over every surface, pressing it into the meat with your hands. Don’t be shy — use about ⅓ cup for an 8-pound shoulder.
Wrap the seasoned shoulder tightly in plastic wrap and refrigerate for 12–24 hours. Pull it out of the fridge 1 hour before you plan to smoke, allowing it to come closer to room temperature for more even cooking.
Step 3: Set Up the Smoker
Prepare your smoker for indirect cooking at 225°F (107°C). If using a charcoal smoker or offset, build your fire and let it settle until you’re holding a steady temperature. Add 2–3 hickory wood chunks to the coals — you want thin, blue smoke, not billowing white clouds. White smoke means incomplete combustion and will make the pork bitter.
If using a pellet smoker, set it to 225°F (107°C) and let it preheat for 15 minutes. For a kettle grill, set up a two-zone fire with charcoal banked to one side and a drip pan filled with water on the other. Place the pork over the drip pan.
Fill a spray bottle with equal parts apple cider vinegar and apple juice — this is your spritz for keeping the surface moist during the cook.
Step 4: The First Four Hours — Building the Bark
Place the pork shoulder fat-side up on the grate, positioning the thicker end toward the heat source. Insert a probe thermometer into the thickest part of the meat, avoiding the bone.
Close the lid and resist the temptation to open it for the first 2 hours. Every time you open the lid, you lose heat and add 15–20 minutes to your cook. Maintain 225°F (107°C) by adjusting your vents — more open for more heat, more closed to bring it down.
After 2 hours, begin spritzing the surface every 45 minutes with the vinegar-apple juice mixture. This keeps the surface moist, helps the smoke adhere, and builds layers of flavor on the bark. Add fresh hickory chunks every 60–90 minutes for the first 4 hours — after that, the meat has absorbed most of the smoke it’s going to take.
By the end of hour 4, the internal temperature should be around 150–160°F (65–71°C), and the exterior should have a deep, mahogany-colored bark forming.
Step 5: The Stall — Patience Is Everything
Somewhere around 160°F (71°C) internal temperature, the pork will hit what pitmasters call “the stall.” The internal temp will plateau — sometimes for 2–4 hours — as the moisture evaporating from the surface cools the meat at the same rate the smoker is heating it. This is normal. Do not panic. Do not crank the heat.
You have two options: push through the stall by maintaining your temperature and waiting it out (this is what my grandfather did, and it produces the best bark), or wrap in butcher paper (the “Texas crutch”) to power through faster. If wrapping, use unlined pink butcher paper — not foil, which steams the bark into mush. Wrap the shoulder tightly at 165°F (74°C) and return it to the smoker.
Unwrapped, the stall adds 2–3 hours to your cook. Wrapped, you’ll push through in about 1 hour. Either way, you’re targeting a final internal temperature of 200–205°F (93–96°C).
Step 6: Know When It’s Done
Temperature is your primary guide, but texture tells the full story. At 200°F (93°C), begin checking for doneness: insert the probe thermometer and it should slide in and out like warm butter with almost no resistance. Grab the bone and wiggle it — it should feel loose, nearly ready to pull free. The bark should be dark, almost black in places, and firm to the touch.
If the probe meets resistance or the bone is still firmly set, keep cooking. Some shoulders need to hit 205°F (96°C) or even 207°F (97°C) before they’re truly done. Every piece of meat is different.
Step 7: The Rest — Don’t Skip This
Remove the shoulder from the smoker and place it on a large cutting board or sheet pan. If you wrapped it, leave the butcher paper on. If you didn’t, tent it loosely with foil.
Let the pork rest for at least 45 minutes, ideally 1 full hour. This allows the juices to redistribute throughout the meat. If you pull it apart too soon, those juices run out onto the board instead of staying in the pork.
For an even longer rest, wrap the shoulder in a towel and place it in a dry cooler (no ice) — this will keep it at serving temperature for up to 4 hours and produces incredibly moist results. This is the competition pitmaster’s secret for keeping pork perfect during judging windows.
Step 8: Pull the Pork
Remove the bone — it should slide out cleanly with almost no meat attached. That’s how you know it’s properly cooked.
Using two forks, bear claws, or insulated gloves, pull the pork apart into long, ragged strands. Work with the grain, not against it. Remove and discard any large pockets of unrendered fat.
Drizzle the pulled pork with 2–3 tablespoons of the accumulated pan juices or a splash of apple cider vinegar and toss gently. Season with additional salt if needed.
Step 9: Make the BBQ Sauce (Optional)
While the pork rests, combine in a medium saucepan over medium heat: 1½ cups ketchup, ½ cup dark brown sugar, ¼ cup apple cider vinegar, 2 tablespoons Worcestershire sauce, 1 tablespoon smoked paprika, 1 tablespoon molasses, 1 teaspoon garlic powder, 1 teaspoon onion powder, and ½ teaspoon cayenne pepper.
Bring to a gentle simmer, stirring frequently, and cook for 15–20 minutes until slightly thickened and the flavors have melded. The sauce should coat the back of a spoon. Season with salt and pepper to taste. For a smoother sauce, blend with an immersion blender. This makes about 2 cups — more than enough for the pork with extra for dipping.
Step 10: Assemble and Serve
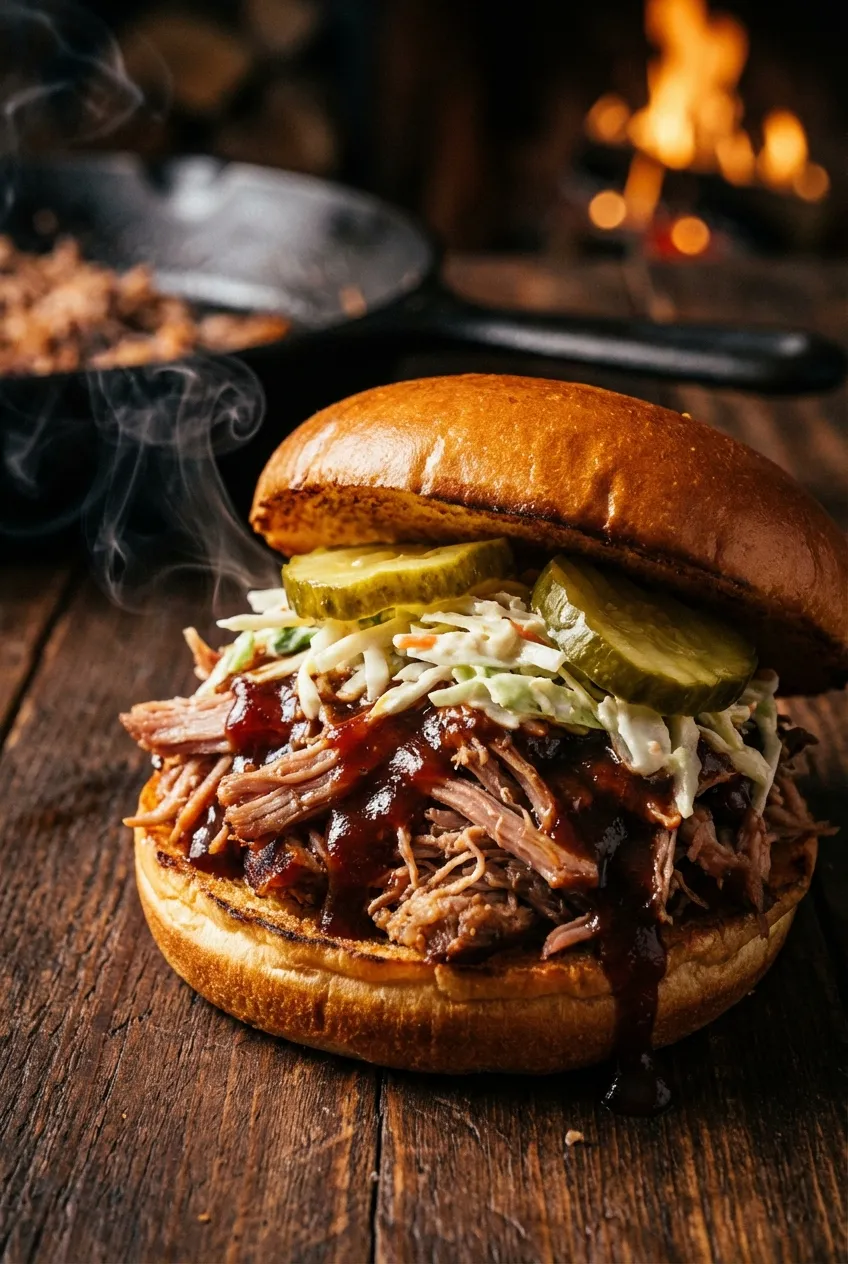
Pile the pulled pork generously onto toasted brioche buns or potato rolls — about 4–5 ounces per sandwich. Drizzle with BBQ sauce or serve it on the side. Top with coleslaw, dill pickle chips, or thinly sliced white onion.
Serve immediately with your favorite sides — mac and cheese, collard greens, baked beans, or cornbread all pair beautifully.
Ingredient Substitutions
| Ingredient | Substitute | Notes |
|---|---|---|
| Bone-in pork shoulder | Boneless pork shoulder | Works but dries out faster. Reduce cook time by about 1 hour and monitor temp closely. |
| Hickory wood | Oak, cherry, or apple wood | Oak gives a milder smoke. Cherry adds a subtle sweetness and beautiful mahogany color. Apple is the mildest — great if you’re new to smoking. |
| Smoked paprika | Sweet paprika + ½ teaspoon liquid smoke | You lose depth, but it works in a pinch. Hungarian sweet paprika is the best substitute. |
| Yellow mustard binder | Olive oil or hot sauce | Any thin, slightly acidic liquid works as a binder. Frank’s RedHot adds a nice kick. |
| Dark brown sugar (rub) | Turbinado sugar or coconut sugar | Turbinado creates a crunchier bark. Coconut sugar has a deeper, almost caramel-like flavor. |
| Apple cider vinegar (spritz) | White vinegar or beer | Beer spritz (any lager) adds a malty sweetness. White vinegar is sharper — use a lighter hand. |
| Ketchup (sauce) | Tomato paste + water + sugar | Use 3 tablespoons tomato paste, ½ cup water, and 1 tablespoon sugar per ½ cup ketchup. |
| Brioche buns | Martin’s potato rolls or King’s Hawaiian | Martin’s is the competition standard — soft, slightly sweet, and holds up to the juices beautifully. |
Chef’s Tips
- Don’t trim too much fat. I see people scalp the fat cap down to bare meat. Leave about a quarter inch — that fat renders during the cook and bastes the pork from the top down. You can always pull out unrendered fat pockets when you shred; you can’t add moisture back to dried-out meat.
- Thin blue smoke is the goal. If your smoke is thick and white, your fire isn’t burning clean. Adjust your airflow, let the wood catch fully before closing the lid, and never smother the fire with too many chunks at once. Dirty smoke makes bitter bark.
- Trust the stall. Every new pitmaster panics when the temperature stalls around 160°F. It’s physics — evaporative cooling. Go mow the lawn, watch a movie, have a beer. The temperature will start climbing again. Cranking the heat to push through the stall just dries out the exterior.
- Rest longer than you think. My grandfather used to say “the meat ain’t ready till it tells you it’s ready.” A 45-minute rest is the minimum; 1–2 hours in a cooler is better. The carryover cooking continues to break down collagen, and the juices redistribute evenly. This is the single biggest difference between good and great pulled pork.
- Save the drippings. The liquid that collects during resting is liquid gold — rendered fat, meat juices, and dissolved bark spices. Drizzle it over the pulled pork before serving or stir it into your sauce. It adds a depth of flavor you can’t get any other way.
- Don’t sauce the whole batch. Serve the sauce on the side and let people add their own. Well-smoked pulled pork doesn’t need sauce to taste incredible, and Memphis tradition leans toward dry-rubbed pork served as-is. But having that tangy, sweet sauce available for those who want it is the right move.
Meal Prep & Storage
- Refrigerator: Pulled pork stores beautifully in an airtight container for up to 5 days in the fridge. Add a few tablespoons of the reserved drippings or apple juice to the container to keep it moist.
- Freezing: Portion the pulled pork into 1-pound freezer bags, press out all the air, and freeze flat for easy stacking. Frozen pulled pork keeps for up to 3 months without losing quality. Add a splash of sauce or drippings to each bag before sealing.
- Reheating: Thaw overnight in the refrigerator. Reheat in a covered saucepan over low heat with a splash of apple juice or broth, stirring occasionally, for 10–15 minutes until warmed through. You can also reheat in a 300°F (150°C) oven in a covered baking dish for 20–25 minutes. Avoid the microwave if possible — it dries the edges.
- Batch cooking: An 8-pound shoulder yields about 5 pounds of finished pulled pork — easily enough for 8–10 sandwiches plus leftovers. Cook two shoulders at once if your smoker has the space; the second shoulder is essentially free since you’re already tending the fire.
- Leftover ideas: Pulled pork tacos with pickled onions, loaded pulled pork nachos, pulled pork fried rice, pulled pork grilled cheese, or stirred into baked beans. This is one of the most versatile proteins in your fridge.
Pairing Suggestions
- Beer: A cold amber ale or brown ale with malty sweetness that complements the smoke. Newcastle Brown Ale or a local craft amber are perfect. For something lighter, a crisp American lager cuts through the richness without competing for attention.
- Bourbon: A pour of straight bourbon — something with caramel and vanilla notes like Maker’s Mark or Buffalo Trace — mirrors the brown sugar and smoke flavors in the rub. Serve it neat or with a single ice cube.
- Sides: Classic coleslaw with a tangy vinegar dressing is the essential pairing — the acidity and crunch balance the rich, fatty pork. Add baked beans, mac and cheese, cornbread, or collard greens for a full Southern spread.
- Non-alcoholic: Sweet iced tea with lemon, or a tart lemonade. The sweetness and acidity both work to cut through the smokiness and refresh the palate between bites.
Frequently Asked Questions
Can I make pulled pork in the oven instead of a smoker? Absolutely. Season the pork the same way, then roast uncovered in a 300°F (150°C) oven on a wire rack set over a sheet pan for 6–8 hours until the internal temperature hits 200–205°F (93–96°C). You won’t get the same smoke flavor, but adding 1–2 teaspoons of liquid smoke to the rub helps bridge the gap. The texture and tenderness will still be excellent.
What if I don’t have 12 hours to smoke? You can run your smoker hotter at 275°F (135°C) to cut the cook time to 7–8 hours. The bark won’t be quite as developed and you get less smoke penetration, but the results are still very good. Another option is smoking for 4 hours at 225°F (107°C) for smoke flavor, then wrapping in butcher paper and finishing in a 300°F (150°C) oven until done.
How do I know when to wrap and when to push through the stall? If you have the time, push through the stall unwrapped — you’ll get a thicker, crunchier bark and deeper smoke ring. Wrap in butcher paper if you’re running short on time or if the bark looks like it’s getting too dark. I wrap about half the time in competition, depending on conditions. Either method produces excellent pulled pork.
My pulled pork is tough and doesn’t shred easily. What happened? You pulled it too early. If the meat resists shredding, the internal temperature likely didn’t get high enough for the collagen to fully break down. You need to hit at least 195°F (90°C), and most shoulders really need 200–205°F (93–96°C). Put it back on the smoker or in a 300°F (150°C) oven until the probe slides through like butter.
Do I need to inject the pork shoulder? Injection isn’t necessary for a well-marbled pork shoulder — the intramuscular fat and collagen provide plenty of moisture when cooked properly. Some competition cooks inject with a mixture of apple juice, pork broth, and melted butter for extra richness, but for a home cook, a good dry brine overnight and proper resting will give you moist, flavorful pork without the extra step.
What’s the pink ring I see under the bark? That’s the smoke ring — a chemical reaction between nitrogen dioxide in the smoke and myoglobin in the meat. It’s a sign that your smoke was clean and your technique was sound. The ring is typically ¼ to ½ inch deep on a well-smoked shoulder. It’s purely cosmetic and doesn’t affect flavor, but it’s a point of pride for any pitmaster. My grandfather used to say a good smoke ring was the meat’s way of saying thank you.